Feather Stitch Circle

I first saw these feather stitch circles on one of Betty Pillsbury blocks in Carole Samples 'Treasury of Crazy Quilt Stitches'.
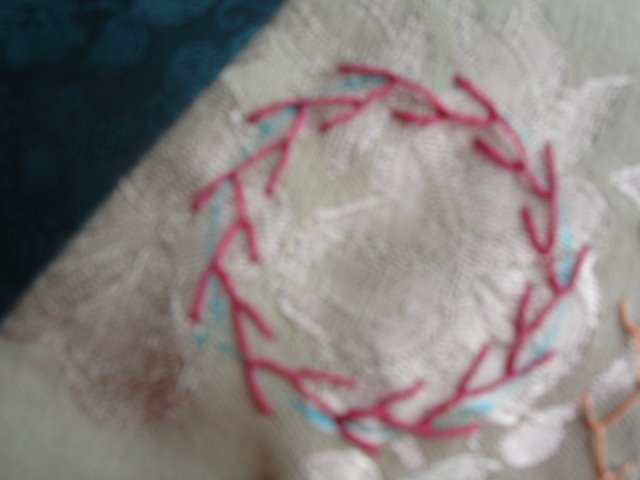
Barbara was asking if I could give some tips on the feather stitch circle so I took some pics while I did one this morning. These are really quick to make- and easy too. I usually choose a fabric that can tolerate a teeny bit of water since I use a water soluble marker to make a circle with. I would be careful on silk fabric since it might leave a watermark. In this example I traced around a spool of thread.
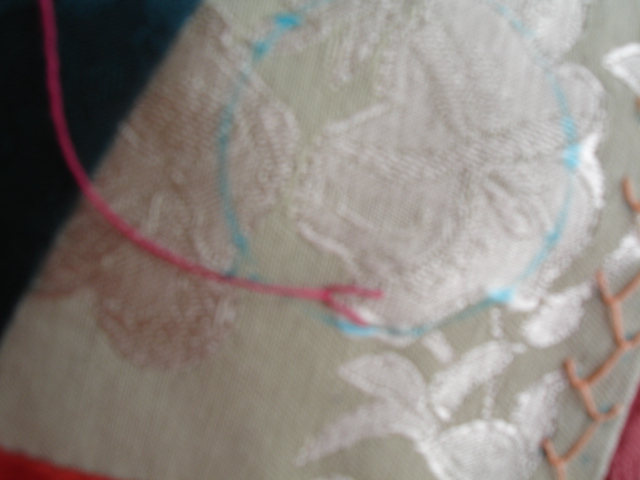
In pic one, I started the circle with the outside arm of the feather stitch on the line.
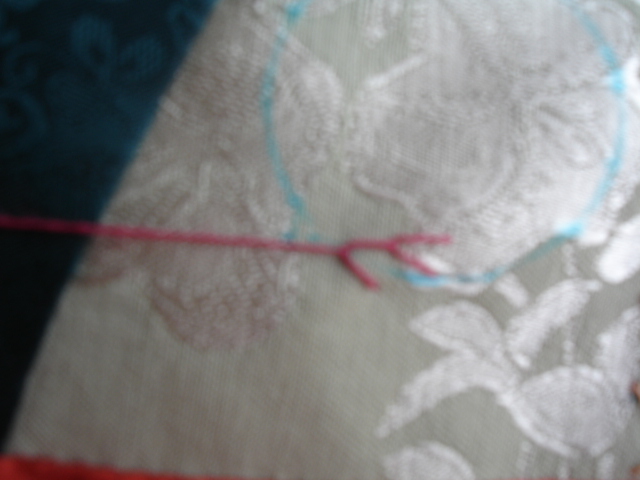
In pic two, The center of the feather stitch is on the line and it is straddling the line...
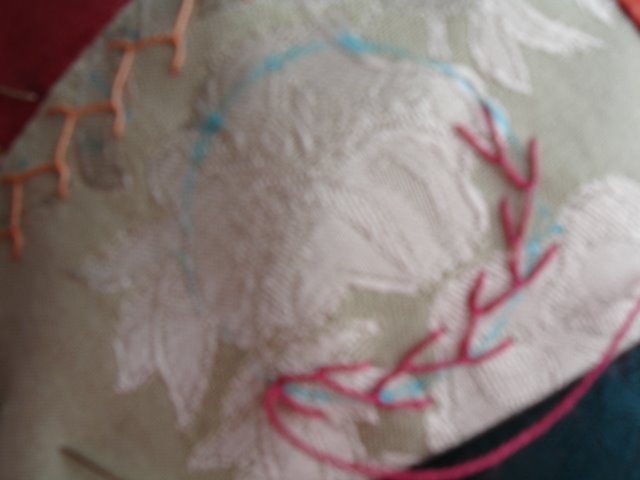
Keep stitching around in this manner until you come full circle. If your stitching isn't perfect it will be 'rounded off' by the lazy daisies and colonial knots added later. It might look crooked, but in the end it will be okay. Also, when you come to joining the circle, you might have to take out a few stitches to get the correct length for joining. (You might have to make a few of the stitches a little bit longer or shorter as needed) You want to have an innie arm connected to an outie arm. If you don't. it will have an extra outie arm in there and it won't be as symmetrical. BUT- I have left them like this and they still worked out. Never got a dirty look from someone when they saw it had an extra arm! =)
Clear as mud??? I will embellish it more tomorrow. =)
And, BTW, I sure wish I could get better close ups on my camera! Argh!
Hi!
ReplyDeleteThank you so much for explaining it to me! I was away for a couple of days, so I didn't see it before now! I will try it later today and tell you how it worked out!